Updated: February 8th 2024
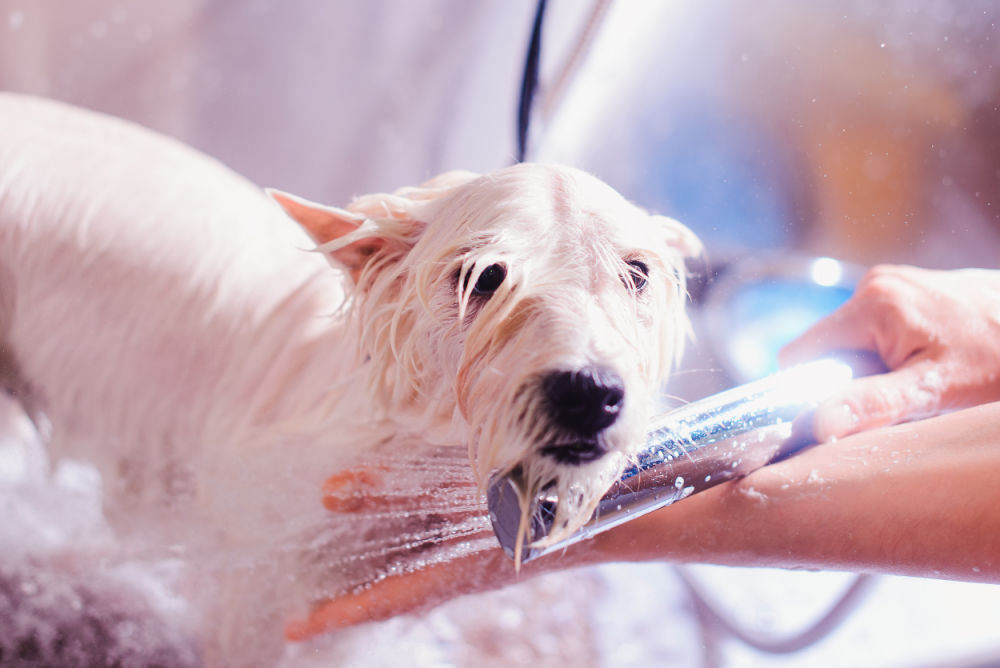
Have you ever noticed your clippers tugging or pulling hair instead of cutting when grooming your dog?
Not only is your furry friend not enjoying their experience, it can be painful for them. If you’re unsure why the clippers aren’t cutting it can be stressful. We’ve all had this experience if we’re honest.
Unfortunately in the moment, probably nothing. That is, unless you have a spare clipper on hand that’s been serviced recently. If you don’t have a spare clipper, you’ll either have to resort to scissoring which will slow you down and not get the result you’re looking for or stop altogether.
Before this happens to you have a read through this post to understand why this may be happening and some solutions for you. This way, the next time you groom a dog with clippers it can be a pain-free and enjoyable session both for you and your dog.
Skip to the 7 reasons why your clipper blades may not be cutting.
Before we get into the reasons why your clippers aren’t cutting or maybe the clipper blades are moving but not cutting, I have one question. Your answer will determine whether you can get the result you want from a grooming session.
When your pet’s hair is dirty or not freshly washed, not only will you not get the result you want, but the lifespan of your clippers will be greatly reduced. Buildup of dirt, grime and dander clog up the clipper making it harder to cut through all of that. This will compromise the integrity of the blade cutting edge and of the hardware on your blade.
Dirt, grime and dander are not your clippers best friend that is for sure! So before you do anything in the grooming session, wash and dry your pet and clean your clippers thoroughly.
Now that we’ve got that covered let’s move on to the real reason I’m writing this post for you.
Nine times out of ten, if a client contacts us about their blades not cutting after being sharpened, the problem generally lies with the condition of the actual clipper. Many clients think the clipper blade must be dull but it’s often not the case. They may just not have been sharpened correctly.
Unfortunately, many of these clients come to us from other sharpeners. Before any blade or clipper leaves our shop it is fully inspected and tested to make sure its cutting as it should. If parts need to be repaired or replaced we make sure it’s done as well.
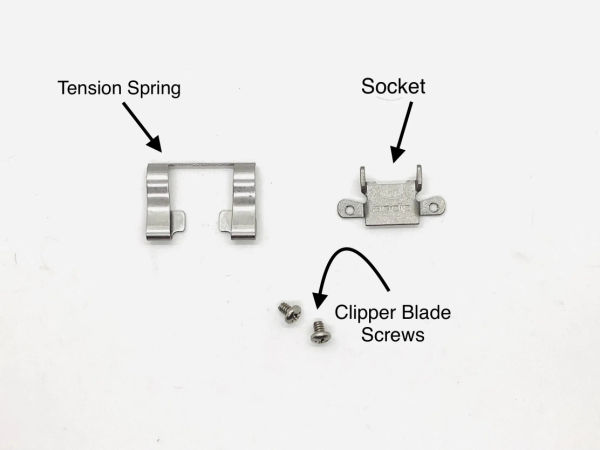
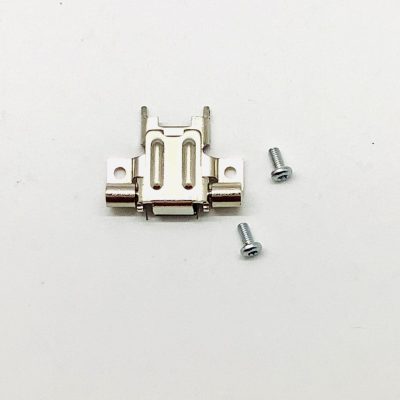
Clipper blades have three hardware components: the socket, tension spring and the screws. They work together seamlessly to ensure the clipper blade has the correct tension to allow it to glide smoothly along the cutting deck of your clipper and proper cutting of hair.
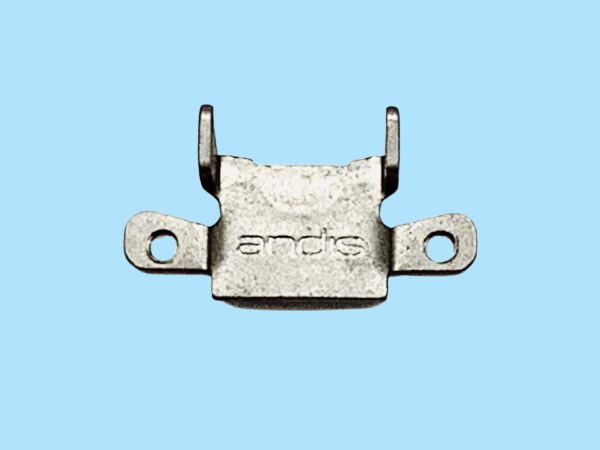
1. Socket
The socket is the piece of clipper blade hardware that sits onto the drive/lever of your clipper and drives your cutter back and forth evenly along the deck. Sockets have to have a certain amount of tension to fit snugly on the drive/lever of your clipper.
2. Tension spring
The tension spring is the clipper blade hardware that maintains tension to ensure the cutter sits just snug enough to slide evenly along the deck but not too tight where the cutter has a hard time moving.
Depending on the type of clipper blade you have we generally set the tension anywhere between 3-4 pounds of pressure. If there is not sufficient tension the clipper blade will not cut properly even on freshly sharpened blades.
3. Screws
Check the tightness of the two screws that secure the socket to the clipper blade to ensure they are not loose, but not too tight.
4. Setback
The setback is another consideration for why clipper blades won’t cut hair. The setback of the blade is basically the amount of space the cutter is placed back from the teeth of the deck. The amount of setback is determined by the length of the clipper blade. The higher the clipper blade number (#10, #15, #30) the closer the cutter needs to be to the edge of the teeth on the deck.
If the setback is incorrect and the cutter sits slightly beyond the edge of the teeth of the deck your clipper blade will not cut hair and you can very easily cut the skin on the animal you’re grooming. This is another reason why we suggest you leaving your blades intact to avoid incorrect reassembly of your clipper blades.
Refer to the blog on What is the best way to clean my clipper blades for more information on cleaning and maintaining your clipper blades.
Now we move onto possible issues with the actual clipper. If the clipper blade has been correctly sharpened, the hardware of the clipper blade is in good condition, and the blade has proper tension, the issue is most likely the actual clipper itself. Clippers have moving parts that are considered wearable parts that need replacing over time.

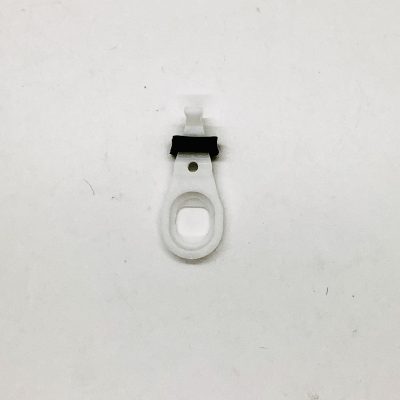
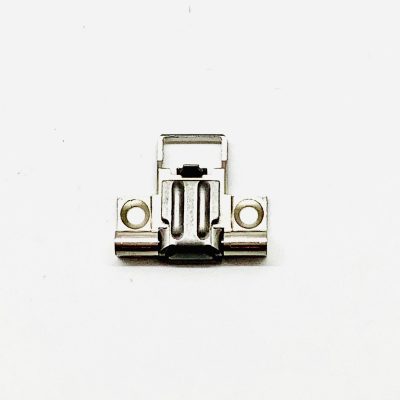
5. Blade drive/lever
The blade drive is generally the biggest culprit in why freshly sharpened blades won’t cut. The blade drive holds the socket in place to drive the cutter evenly along the deck of the blade. Over time the drive/lever edges wear down and become rounded or worn which affects the performance of the clipper blade.
The cutter blade won’t run smoothly if this happens and along the deck the clipper blade and may begin to get louder (like a rattling noise) when running.
The blade may also begin to “pull” hair rather than cut hair. Sometimes clients think their blades are either dull or suspect that their blades were not sharpened properly by the sharpener when the actual clipper requires servicing.
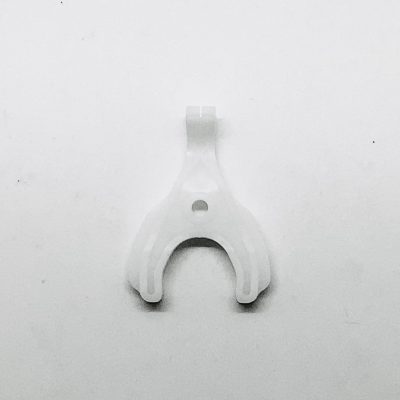
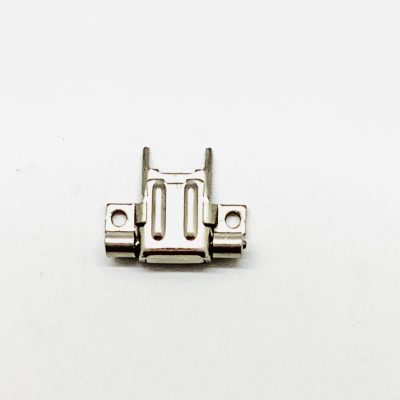
6. Hinge
Another reason why your clipper blade may not be cutting could be the hinge on your clipper. The hinge is the part the clipper blade slides onto. It has small springs which anchor the latch that locks your clipper blade down once the clipper is turned on.
A good indication that your hinge springs are becoming weak is if your clipper blade keeps popping up away from the clipper when there is any resistance while clippering your pet.
If the clipper blade does not remain locked down in place while the clipper is operating then you might require a new hinge.
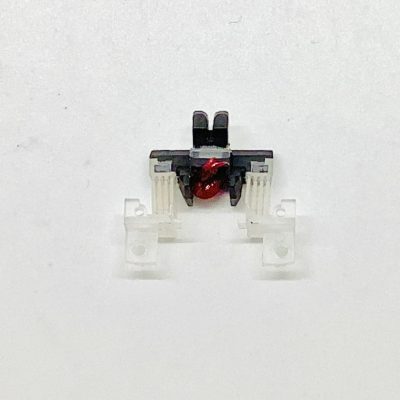
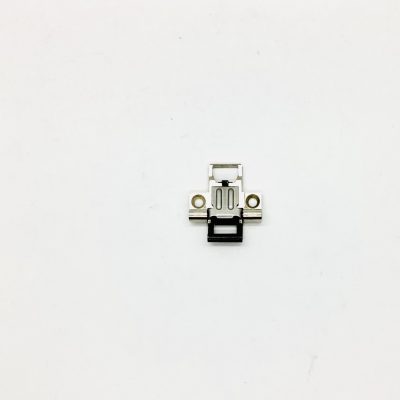
7. Latch
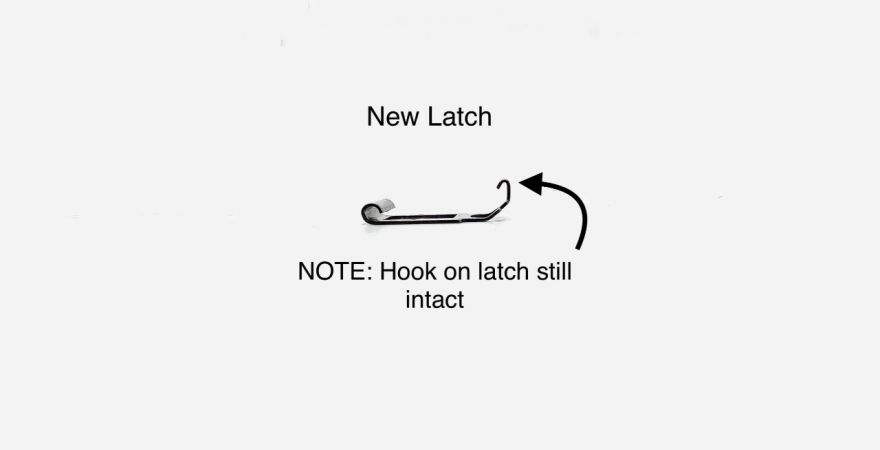
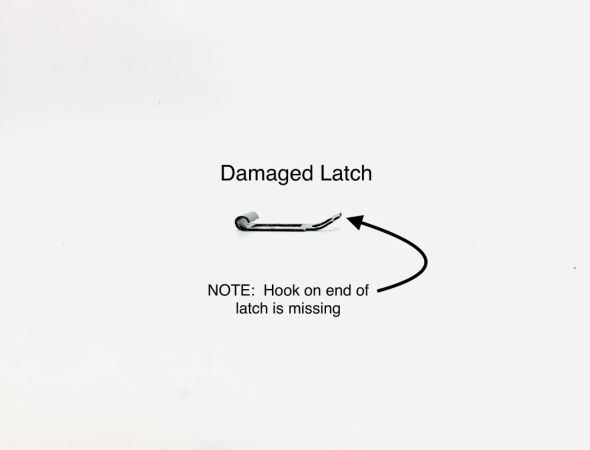
The latch fits onto the bottom of the hinge and is secured by the hinge springs. The top part of the latch also helps to lock down the clipper blade securely to the clipper. Generally the latch will have a bit of a “hook” on the top end (depending on the type of clipper you have) which locks the clipper blade in place when the clipper is running.
If the “hook” on the latch is broken there’s nothing to secure the clipper blade to the clipper. Installing a new latch is an easy fix for us at the shop.
We suggest clippers be regularly cleaned and inspected a minimum once per year for the “do it yourself” pet groomer or twice per year at the minimum for the busy salon groomer. Regular maintenance of your clippers will help to ensure everything is running efficiently and properly.
All the parts mentioned above are generally quite inexpensive and readily available (depending on the model) for most clippers. Sharpeners who service clipper blades and clippers will generally stock these parts.

I hope that this post was helpful and you learned how important it is to clean and service your clippers. I hope you enjoy your next grooming session with the helpful tips I’ve outlined above.
Please reach out to me if you have any questions.
Sherry